Final Fantasy XII - Exploring The Feywood
Good evening, and welcome to this blog version of a Let's Play for Final Fantasy XII. If you have read some of my previous articles you will know that Joe and I take our time with our games. Joe and I both have busy lives, so we get can only get together a few times a month to play games. It can take us a while to get through games this way, but we do our best to make the most out of our game time.
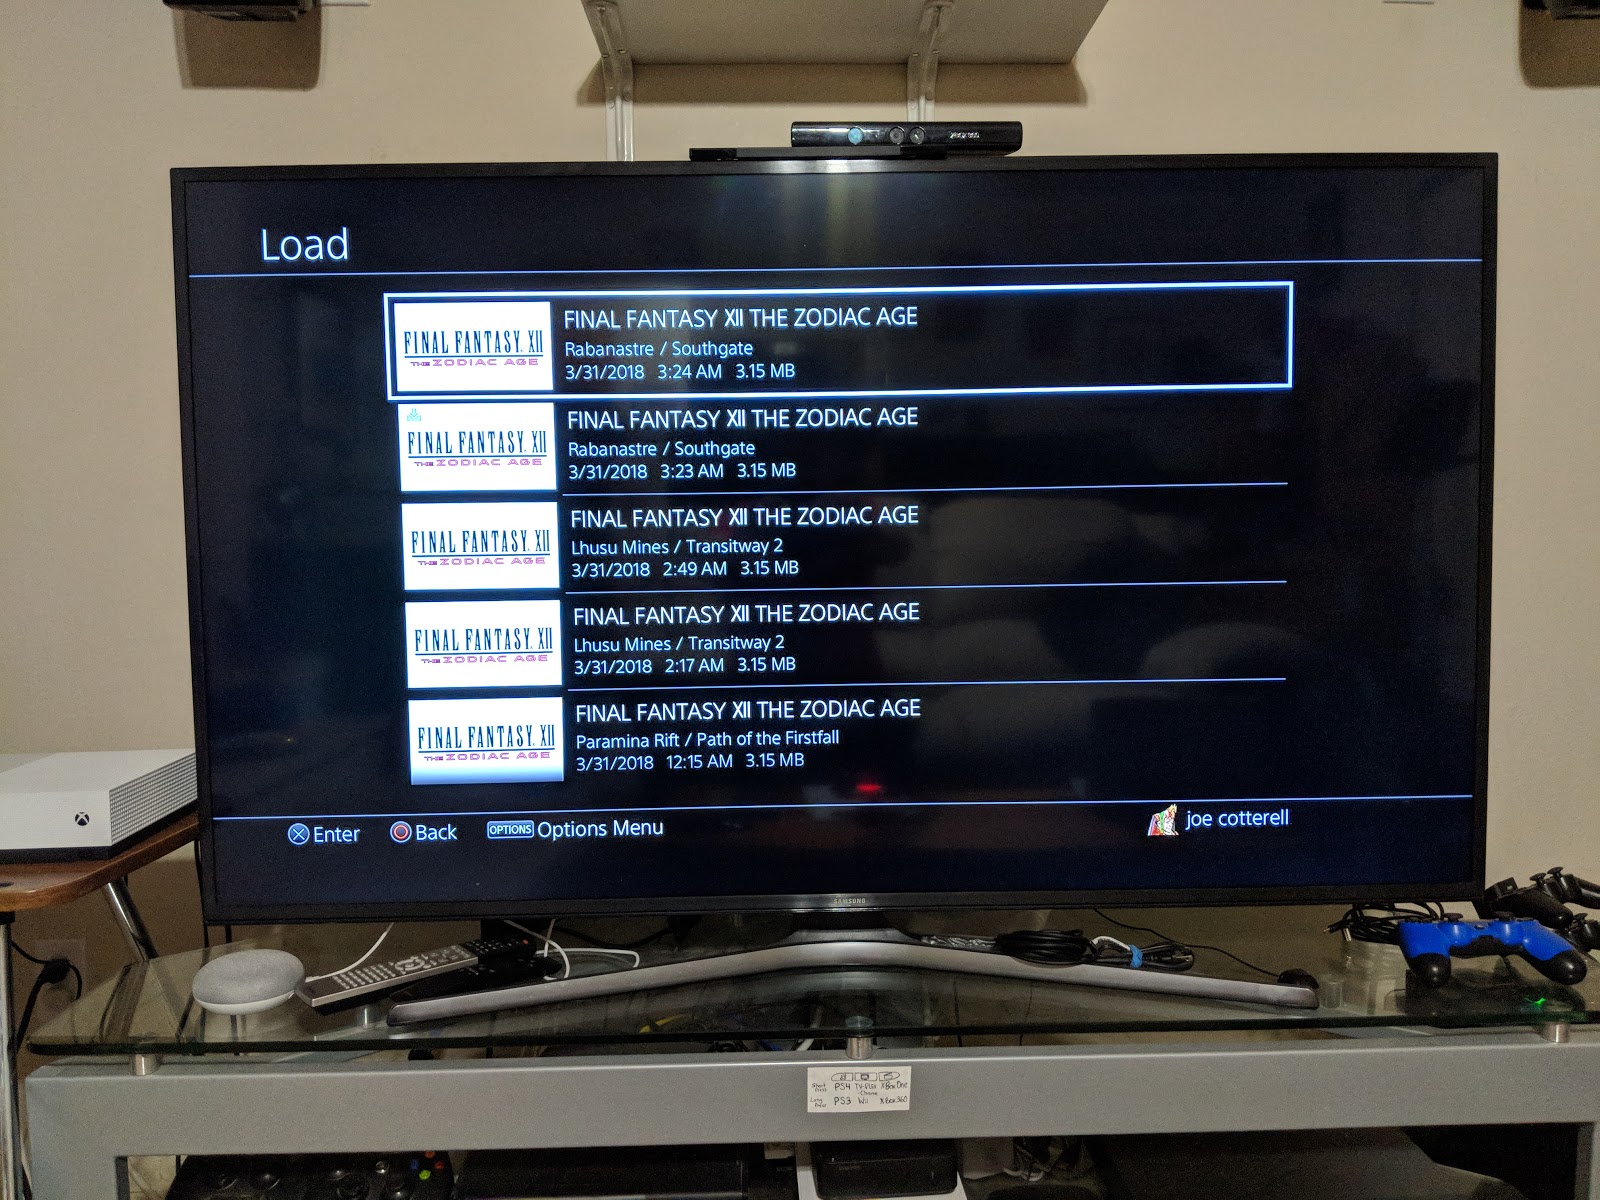
Tonight is our 11th session on for Final Fantasy XII: The Zodiac Age for the PlayStation 4. We have been playing this off and on since it was released in 2017. Here are a few pics of the game and guide that we are using.
For comparison, here are some pics of the original version of Final Fantasy XII that came out in 2006, along with the pics of a neat UK version of the strategy guide I picked up last year.

Tonight is our 11th session on for Final Fantasy XII: The Zodiac Age for the PlayStation 4. We have been playing this off and on since it was released in 2017. Here are a few pics of the game and guide that we are using.
 |
 |
 |
For comparison, here are some pics of the original version of Final Fantasy XII that came out in 2006, along with the pics of a neat UK version of the strategy guide I picked up last year.

 |
 |
 |
If you remember the last session, we worked solely on hunts. We talked about exploring The Feywood afterward if we had time. Well, tonight we are going to make good on the promise. Time to load up our save!
First, we do have a hunt to finish up: Paradise Risen. We worked on this hunt last time, and on previous sessions. This hunt is pretty tricky because you have to have certain weather in Giza Plains for each step. The last session we killed the Gil Snapper, but we were unable to speak to the petitioner and complete the quest because apparently the guy doesn't like rain, and is only available in Dry Weather.
Heading straight to Weather Eye at the Rabanastre South Gate, we check in with this local weather wizard. It's still raining in Giza, but it looks to be over soon. A great time to kill a few minutes checking in with all the shops in town and the Clan Hall.

 Moving onto the Clan Provisioner, we sell all our loot from our last session and make a nice profit. We gain almost 30,000 Gil. Things are looking up for us tonight. As soon as we finished selling our loot a few minutes ago, we were notified that there were new Bazaar goods available. Sure enough, there is a Platinum Gear available for purchase; only 9800 Gil. What a steal. Let's get that guy!
 Now that we have the bazaar item purchased, let's see what new items the Clan Provisioner has. Ah, here we see he still has the Cat-ear Hood for 50,000 Gil. Okay, I know we said we would wait a bit to purchase this, but now we seem to be rolling in the dough! Let's get 2 of them now, as we should be needing them very soon. If you remember, this is the item that is useful once License Points (LP) are no longer needed. It will convert that LP for the character to Gil.
The only issue here is that we are starting to run out of Gambits, We have so many set up to aide when a character has various status ailments, that we have few left for the attacking and other actions. We are really looking forward to getting the Ribbon item unlocked on the License Boards, and then getting high enough level to start farming them. We are just one or two licenses away from unlocking them on the License Boards, but at level 35 we are nowhere near strong enough to farm them yet.
It's probably been enough time for the weather is Giza to change, so we had back to Weather Eye and check-in. Yep, it's DRY TIME! Quickly we run out to through Giza and into the Nomad Village to finally, and completely, forever more, finish the Paradise Risen hunt.
Okay, time for some exploration now! We set our sights on The Feywood, and make our way there. We head south from Giza Plains to Ozmone Plain, intending on just running through the zones quickly. We are surprised when we run smack into a huge elemental, the Sylphi Entite. That's a good find because we remember that later in the game you will actually need to seek these guys out to get their rare drops.
We are even more surprised when we start to have real trouble in the fight. Seeing that the party is spending so much time dealing with Silence (Sylphi is casting Silencega consistently), we swap out a few pieces of equipment. For Vaan and Penelo we swap in the Rose Corsage accessory (Immune to Silence). For Vaan, we swap out of the Iga Blade (water based) for the Sword of Kings (no element). This makes the fight manageable and we wrap up the fight.
Heading east to Golmore Jungle, we then turn south to The Feywood. There isn't any quest that we need to complete in The Feywood, nor is there a story element here. This is just pure unadulterated exploration. Can we survive there? What type of enemies will we see? Any rare monsters? Are there any other new zones we can get to?
Hold those questions just a few minutes. We just realized that we haven't spent any of our LP for a while, so let's do some upgrades first. We have about 400 LP to spend. Unlocking licenses now that are worth close to 200 LP now, most of our characters are almost maxed out on their licenses. We have been unlocking them from lowest LP cost to the highest. We have been putting off unlocking the Quickenings and the Espers till later because we wanted to plan them out based on what licenses are hidden behind them. Pretty cool though; we had just enough LP to unlock the Ribbon for Fran on her Uhlan class. Now we have to see how we can come across one of these super rare Ribbons.
Jumping into our first fight, things get a little dicey with two Deadly Nightshades casting Scream (Silence and Blind), and a Golem kicking us down pretty hard with Wild Charge (+50% damage) hitting for about 2,500 and Tri-Attack (slow). It takes a little more hand-holding to make it through this fight. From now one we need to take these guys on separately.
Exploring further, we set out to remove the "fog of war" from each of the areas in The Feywood. Heading east and then south to the closest save crystal, we make it to this safe haven on zero MP and low health. This place is a challenge, but Fun! We also found another Embroidered Tippet, bringing us to a total of two. These are great accessories that double the EXP acquired. They will be great for leveling up our characters. We will certainly be using them later on in the game.
Although we aren't finding any treasure chests or monsters with any particularly valuable items yet, we do find an exit from the zone in the south-west. Taking a closure look, it actually connects to the Phase 2 Shaft of the Henne Mines! Wow, that sure took us by surprise.
Inside we see some bats just out of aggro range.. level 64 Abysteel! Umm, our team is only level 36, but what the heck. We figure we can run back into The Feywood if we can't handle them. We can't seem to get the two bats separated, so we jump in and fight them together. They are super tough, and we couldn't finish the fight alone, so we kick off a Quickening to try and wipe them out. One bat was downed by the Quickening, and the other is still hammering away at us. We are barely hanging on now. As we try to scramble to stay alive and find out how much life the remaining Abysteel has... it drops dead. I guess it was on its last leg too.
Back in The Feywood we continue our scouting, and then all of a sudden Joe says "Look at her MP!". For some reason, it was regenerating at a considerable rate. This was fully unexpected! I mean everyone has a slow regeneration, but this was amazing. It must be from the Sage's Ring. Wow, this accessory is just getting better and better.
After a bit more exploration we see that Penolos MP continues to regenerate, even faster than the rate she is using the MP. Running into another Golem, we get a rare steal; "Judicer's Staff". Nice! So far this has been quite a good haul over here in the Feywood. Even now Penelo's MP is totally full from all the regeneration.
Before leaving The Feywood, we do find one rare monster that lives here, the Crypt Buddy. To get this rare monster to appear, we have to kill all the Tarturus and at least 5 Cerberus in the Walk of Stolen Truths.
Back in Rabanastre, we spend some more LP, and actually unlock our first Esper. This one is for Ashe, on her Time Battlemage License Board. This now gives us access to the WHM 4 License; Cura and Raise. We also have finished up Fran's License Board so we move onto her 2nd and 3rd Quickenings (Q75 and Q100). Next, for Basche, his License Board is finished so we move onto his 2nd Quickening (Q100). These upgrades help a lot because now we can cast Cura and Raise with almost all of our characters in both parties.
I remember that there was an entrance for Zertinan Caverns from Dalmasca Westersands, so we head over there to take a look. Sure enough, there is an entrance to the caverns that we never entered. The monsters were actually easier here than in The Feywood, so we look to be good exploring here. We get halfway into the zone, and guess what? We run right into Marilith for the Tingling Toast hunt. Marilith isn't too hard for us, so there is a 2nd hunt completed tonight that we have had for quite a while. Nice going on a hunch.
One more hunt is done. And now, time for bed.
Happy Game Nights!

|
|
Paradise Risen
First, we do have a hunt to finish up: Paradise Risen. We worked on this hunt last time, and on previous sessions. This hunt is pretty tricky because you have to have certain weather in Giza Plains for each step. The last session we killed the Gil Snapper, but we were unable to speak to the petitioner and complete the quest because apparently the guy doesn't like rain, and is only available in Dry Weather.
Heading straight to Weather Eye at the Rabanastre South Gate, we check in with this local weather wizard. It's still raining in Giza, but it looks to be over soon. A great time to kill a few minutes checking in with all the shops in town and the Clan Hall.

There's nothing new at the standard shops, but at the Clan Hall we have actually ranked up to Riskbreaker! Wahoo! This is great because it should unlock new items for sale at the Clan Provisioner, and give us access to harder hunts from Montblanc.

|

|
 |
Checking in with Ma'Kenroh we see how we are doing for our next Clan Hall title upgrade. We need to have defeated 24 marks (currently we are at 16) and have 250,000 clan points (currently over 500,000). Seems we can't really level up our Clan Hall title till we complete quite a few more hunts, 8 more to be precise.
 Moving onto the Clan Provisioner, we sell all our loot from our last session and make a nice profit. We gain almost 30,000 Gil. Things are looking up for us tonight. As soon as we finished selling our loot a few minutes ago, we were notified that there were new Bazaar goods available. Sure enough, there is a Platinum Gear available for purchase; only 9800 Gil. What a steal. Let's get that guy!
Bazaar Goods
In FFXII, there is a separate option in all shops called Bazaar. The Bazaar is the same in any shop, so if there was an item in the Bazaar you could buy it at any shop in the game. When you start the game, there is nothing available there. As you sell loot to shops (there is a special section in your inventory for loot), sometimes it will trigger items to show up at the bazaar. When that happens, the player is notified.
All bazaar goods have their own requirement on what sold loot will make it appear. Once you purchase an item from the bazaar and leave the bazaar menu, that items requirements are reset. Using this logic, it is possible to purchase bazaar items at a lower cost sometimes if they have overlapping requirements, and you purchase them together before leaving the bazaar menu. This would mean that the most efficient way to buy bazaar items is:
|
That package includes Platinum Helm, Platinum Armor, and Platinum Shield. We have these items already from the last time the package showed up in the bazaar, but now we have two. Checking our upgrades, it's definitely an improvement for us when checking out the Optimize feature. Let's get these equipped!
Optimize Feature in Equipment
There is a feature in the equipment menu for FFXII that does a quick optimize. For the weapons, armor, shields, and hats it does a good job equipping the most beneficial item for you. The one slot it won't update is your accessory. Those are usually so situational anyways that this is best left to be done manually. I should also mention that even though Optimize might equip the most powerful sword, sometimes you may want a different one due to elemental or status properties.
TIP: Once you optimize all your characters, go through them again to look for any upgrades. Sometimes when one character upgrades out of a piece of equipment, the old equipment will still be an upgrade for another character.
|

Still looking at the Clan Provisioner's good, we page over to his Magicks and we flip our lid!!! He has Bubble for sale!!! This is such an important spell! It's a magic spell that doubles the max HP of the character its cast on. This is so key for surviving tougher fights; instead of having 3,600-4,000 HP on our characters they will have 7,200-8,000 HP! This is super exciting, way more than the Cat-ear Hood. Let's get this setup in our gambits right away!
 |
 |
 |
"... instead of having 3,600-4,000 HP on our characters they will have 7,200-8,000 HP!"Upon setting up the Gambits, we realize that Vaan has access to Bubble now. He is in our main party, has MP, but doesn't cast that much magic. This will be a perfect use for his HP, letting the healer Penelo save her MP for healing. We designate Basch from our backup party to cast Bubble for them. This is going to be great!
The only issue here is that we are starting to run out of Gambits, We have so many set up to aide when a character has various status ailments, that we have few left for the attacking and other actions. We are really looking forward to getting the Ribbon item unlocked on the License Boards, and then getting high enough level to start farming them. We are just one or two licenses away from unlocking them on the License Boards, but at level 35 we are nowhere near strong enough to farm them yet.
It's probably been enough time for the weather is Giza to change, so we had back to Weather Eye and check-in. Yep, it's DRY TIME! Quickly we run out to through Giza and into the Nomad Village to finally, and completely, forever more, finish the Paradise Risen hunt.
 |
 |
The Feywood
Okay, time for some exploration now! We set our sights on The Feywood, and make our way there. We head south from Giza Plains to Ozmone Plain, intending on just running through the zones quickly. We are surprised when we run smack into a huge elemental, the Sylphi Entite. That's a good find because we remember that later in the game you will actually need to seek these guys out to get their rare drops.
We are even more surprised when we start to have real trouble in the fight. Seeing that the party is spending so much time dealing with Silence (Sylphi is casting Silencega consistently), we swap out a few pieces of equipment. For Vaan and Penelo we swap in the Rose Corsage accessory (Immune to Silence). For Vaan, we swap out of the Iga Blade (water based) for the Sword of Kings (no element). This makes the fight manageable and we wrap up the fight.
 |
 |
Heading east to Golmore Jungle, we then turn south to The Feywood. There isn't any quest that we need to complete in The Feywood, nor is there a story element here. This is just pure unadulterated exploration. Can we survive there? What type of enemies will we see? Any rare monsters? Are there any other new zones we can get to?
Hold those questions just a few minutes. We just realized that we haven't spent any of our LP for a while, so let's do some upgrades first. We have about 400 LP to spend. Unlocking licenses now that are worth close to 200 LP now, most of our characters are almost maxed out on their licenses. We have been unlocking them from lowest LP cost to the highest. We have been putting off unlocking the Quickenings and the Espers till later because we wanted to plan them out based on what licenses are hidden behind them. Pretty cool though; we had just enough LP to unlock the Ribbon for Fran on her Uhlan class. Now we have to see how we can come across one of these super rare Ribbons.
Unlocking Licenses Board Quickenings and Espers
95% of the License Boards for characters are straightforward. You get enough LP, and you unlock them all. Henceforth I will call these Open Licenses.
One interesting note is that when a unique License from on characters class board is unlocked, the same unique license on the other characters class board is unlocked.
The other 5% is more complicated, as they are locked and cannot be accessed unless unlocked. Each License Board has some of these locked nodes, and they are hidden behind either a Quickening License or an Esper License.
Where the complication comes in is that each character can only have 3 of the 4 Quickenings unlocked. As for the Espers, there are 13 of them, and only one character can have an Esper unlocked.
Due to this limitation, you have to decide which Quickenings and Espers to unlock for each character. Some of these Locked Licenses may also get unlocked via a License from the other characters License Board, so you need to take that combination into account as well. It all gets very complex, and that is why Joe and I created an Excel Spreadsheet to help. With this spreadsheet, you can swap out the class combinations for each character, and then drill down to what are the Open and Locked Licenses. it's not all automatic, but it does help with the decisions so you can make the most of them.
|
Jumping into our first fight, things get a little dicey with two Deadly Nightshades casting Scream (Silence and Blind), and a Golem kicking us down pretty hard with Wild Charge (+50% damage) hitting for about 2,500 and Tri-Attack (slow). It takes a little more hand-holding to make it through this fight. From now one we need to take these guys on separately.
 |

|
 |
Exploring further, we set out to remove the "fog of war" from each of the areas in The Feywood. Heading east and then south to the closest save crystal, we make it to this safe haven on zero MP and low health. This place is a challenge, but Fun! We also found another Embroidered Tippet, bringing us to a total of two. These are great accessories that double the EXP acquired. They will be great for leveling up our characters. We will certainly be using them later on in the game.
Although we aren't finding any treasure chests or monsters with any particularly valuable items yet, we do find an exit from the zone in the south-west. Taking a closure look, it actually connects to the Phase 2 Shaft of the Henne Mines! Wow, that sure took us by surprise.
Inside we see some bats just out of aggro range.. level 64 Abysteel! Umm, our team is only level 36, but what the heck. We figure we can run back into The Feywood if we can't handle them. We can't seem to get the two bats separated, so we jump in and fight them together. They are super tough, and we couldn't finish the fight alone, so we kick off a Quickening to try and wipe them out. One bat was downed by the Quickening, and the other is still hammering away at us. We are barely hanging on now. As we try to scramble to stay alive and find out how much life the remaining Abysteel has... it drops dead. I guess it was on its last leg too.
 |

|
Our first impulse was to run from this place since we barely survived the first fight. But the loot... the unknown... it was calling to us. After recovering from our battle, we are ready to travel further down this Phase 2 Shaft. We see another bat ahead but it doesn't have any friends around, so we should be in better shape for taking it on. We toy with the idea of farming them for the rare drop "Demon Shield". It would actually double the evade for Ashe. With a 5% drop rate though, we decide to come back another time with a little more firepower.
After a few more fights like that, and we reach a dead end. Bummer, we were hoping this would lead to a bigger place. There was one chest up that had a decent item, but we noticed from the guide there is a 2nd chest that was not up. After zoning out and in a few times, the 2nd chest appeared. We looted it and got the Sage's Ring. Wow, this is actually pretty neat; it drops the MP cost for the user by 1/2. Pretty neat indeed! Of course we equip it right away on Penelo (Whitemage) who is always running out of MP keeping our party alive. With all the curing and buffs she has been casting, her MP was literally at 0.
Chests
Chests in FFXII have a percentage on whether they appear on the map when entered. Some chests are 100%, meaning they are always there, while some are rarer. For the rare chests, you may have to run in and out of the zone many times before it will appear.
Once a chest appears, it will have either Gil or one of two items. If you have the Diamon Armlet equipped, the items and percentages are usually different. |
Back in The Feywood we continue our scouting, and then all of a sudden Joe says "Look at her MP!". For some reason, it was regenerating at a considerable rate. This was fully unexpected! I mean everyone has a slow regeneration, but this was amazing. It must be from the Sage's Ring. Wow, this accessory is just getting better and better.
After a bit more exploration we see that Penolos MP continues to regenerate, even faster than the rate she is using the MP. Running into another Golem, we get a rare steal; "Judicer's Staff". Nice! So far this has been quite a good haul over here in the Feywood. Even now Penelo's MP is totally full from all the regeneration.
Before leaving The Feywood, we do find one rare monster that lives here, the Crypt Buddy. To get this rare monster to appear, we have to kill all the Tarturus and at least 5 Cerberus in the Walk of Stolen Truths.
Back in Rabanastre, we spend some more LP, and actually unlock our first Esper. This one is for Ashe, on her Time Battlemage License Board. This now gives us access to the WHM 4 License; Cura and Raise. We also have finished up Fran's License Board so we move onto her 2nd and 3rd Quickenings (Q75 and Q100). Next, for Basche, his License Board is finished so we move onto his 2nd Quickening (Q100). These upgrades help a lot because now we can cast Cura and Raise with almost all of our characters in both parties.

|

|
 |
Tingling Toast
With our exploration coming to a close, we find it's a little late in the night to start working on the main story, so we look into another one of our active hunts; Tingling Toast. This is a hunt we have had for a long time, but we thought that the Zertinan Caverns was too tough. It is also quite a maze and a tough place to navigate.I remember that there was an entrance for Zertinan Caverns from Dalmasca Westersands, so we head over there to take a look. Sure enough, there is an entrance to the caverns that we never entered. The monsters were actually easier here than in The Feywood, so we look to be good exploring here. We get halfway into the zone, and guess what? We run right into Marilith for the Tingling Toast hunt. Marilith isn't too hard for us, so there is a 2nd hunt completed tonight that we have had for quite a while. Nice going on a hunch.
 |
 |
 |
Happy Game Nights!


Comments
Post a Comment